
How to group students
How to group students?
If teachers need to group course students, please refer to the following methods:
Step 1: Please click "Groups" in "Administration" on the left side of the course homepage.

Step 2: After clicking, the screen as shown in the figure below, please click "Create Group".

Step 3: Click on the screen as shown below, please enter the group name in "Group Name", and fill in the "Group description" if you have relevant instructions.
Step 4: Please click "Save changes" after filling in.

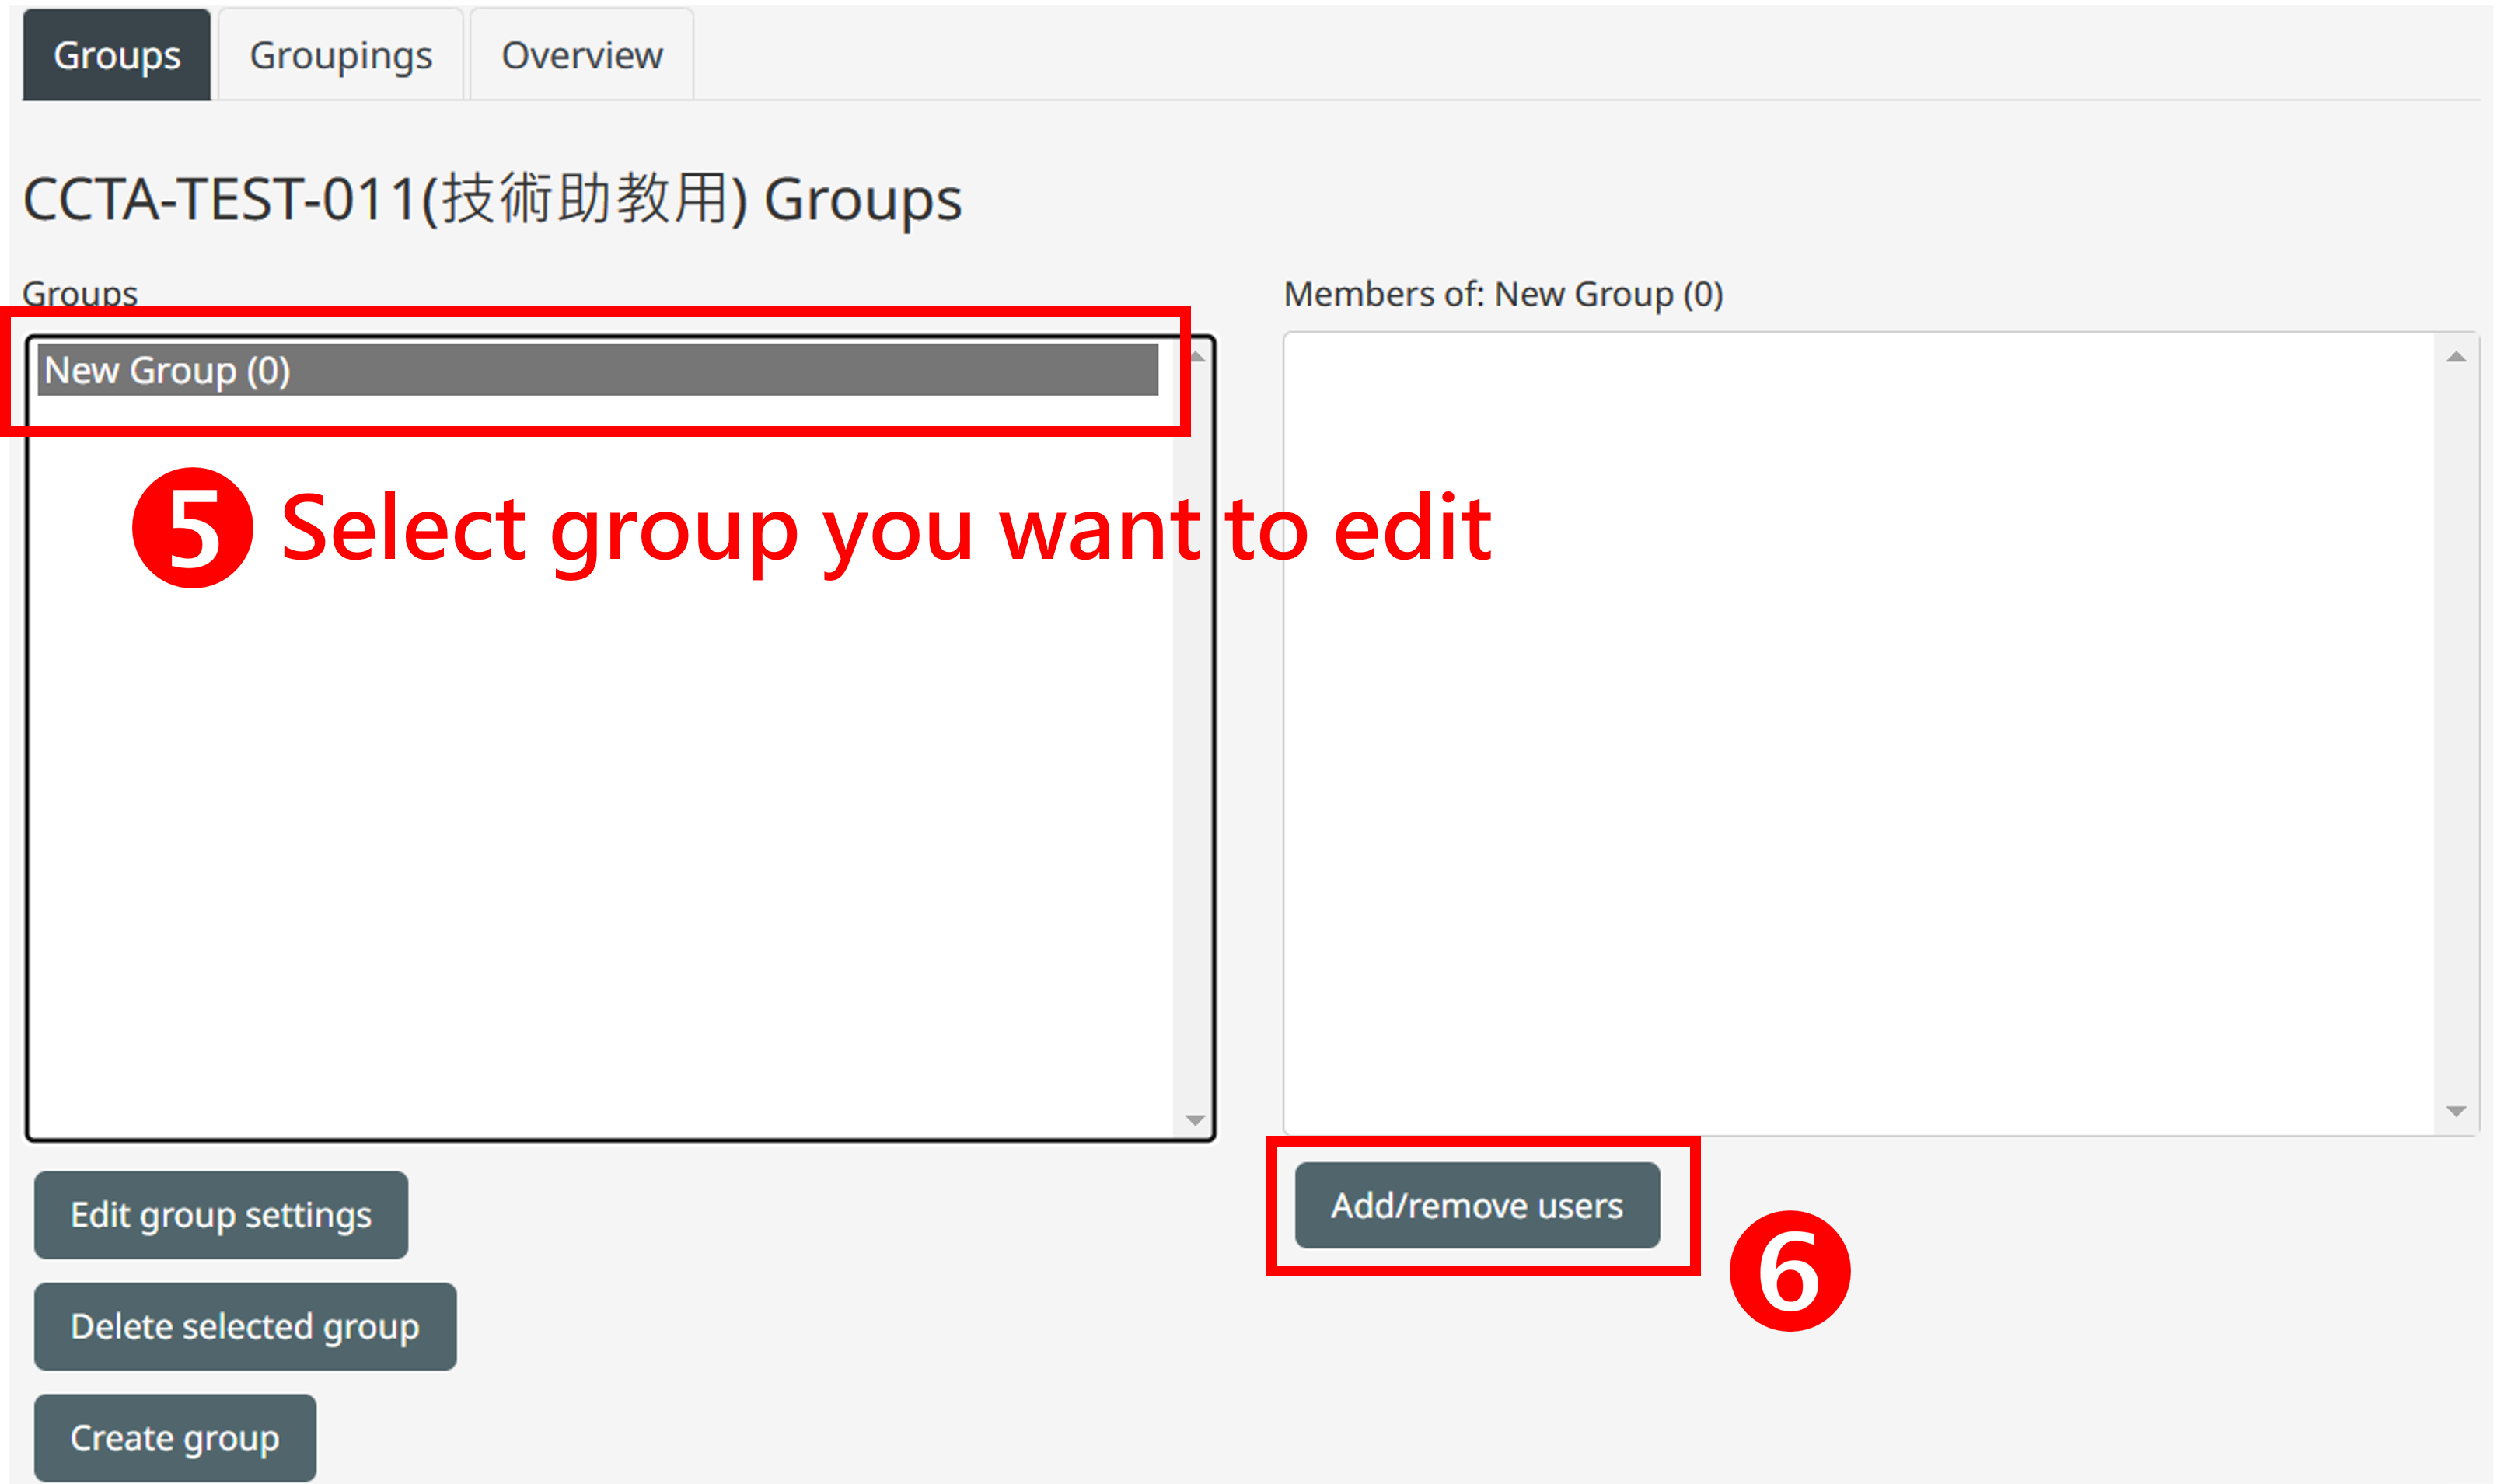
Step 5: After creating a group, please click on the group you want to add the member to.
Step 6: Then click "Add/remove user" in the page column to add/remove group members.
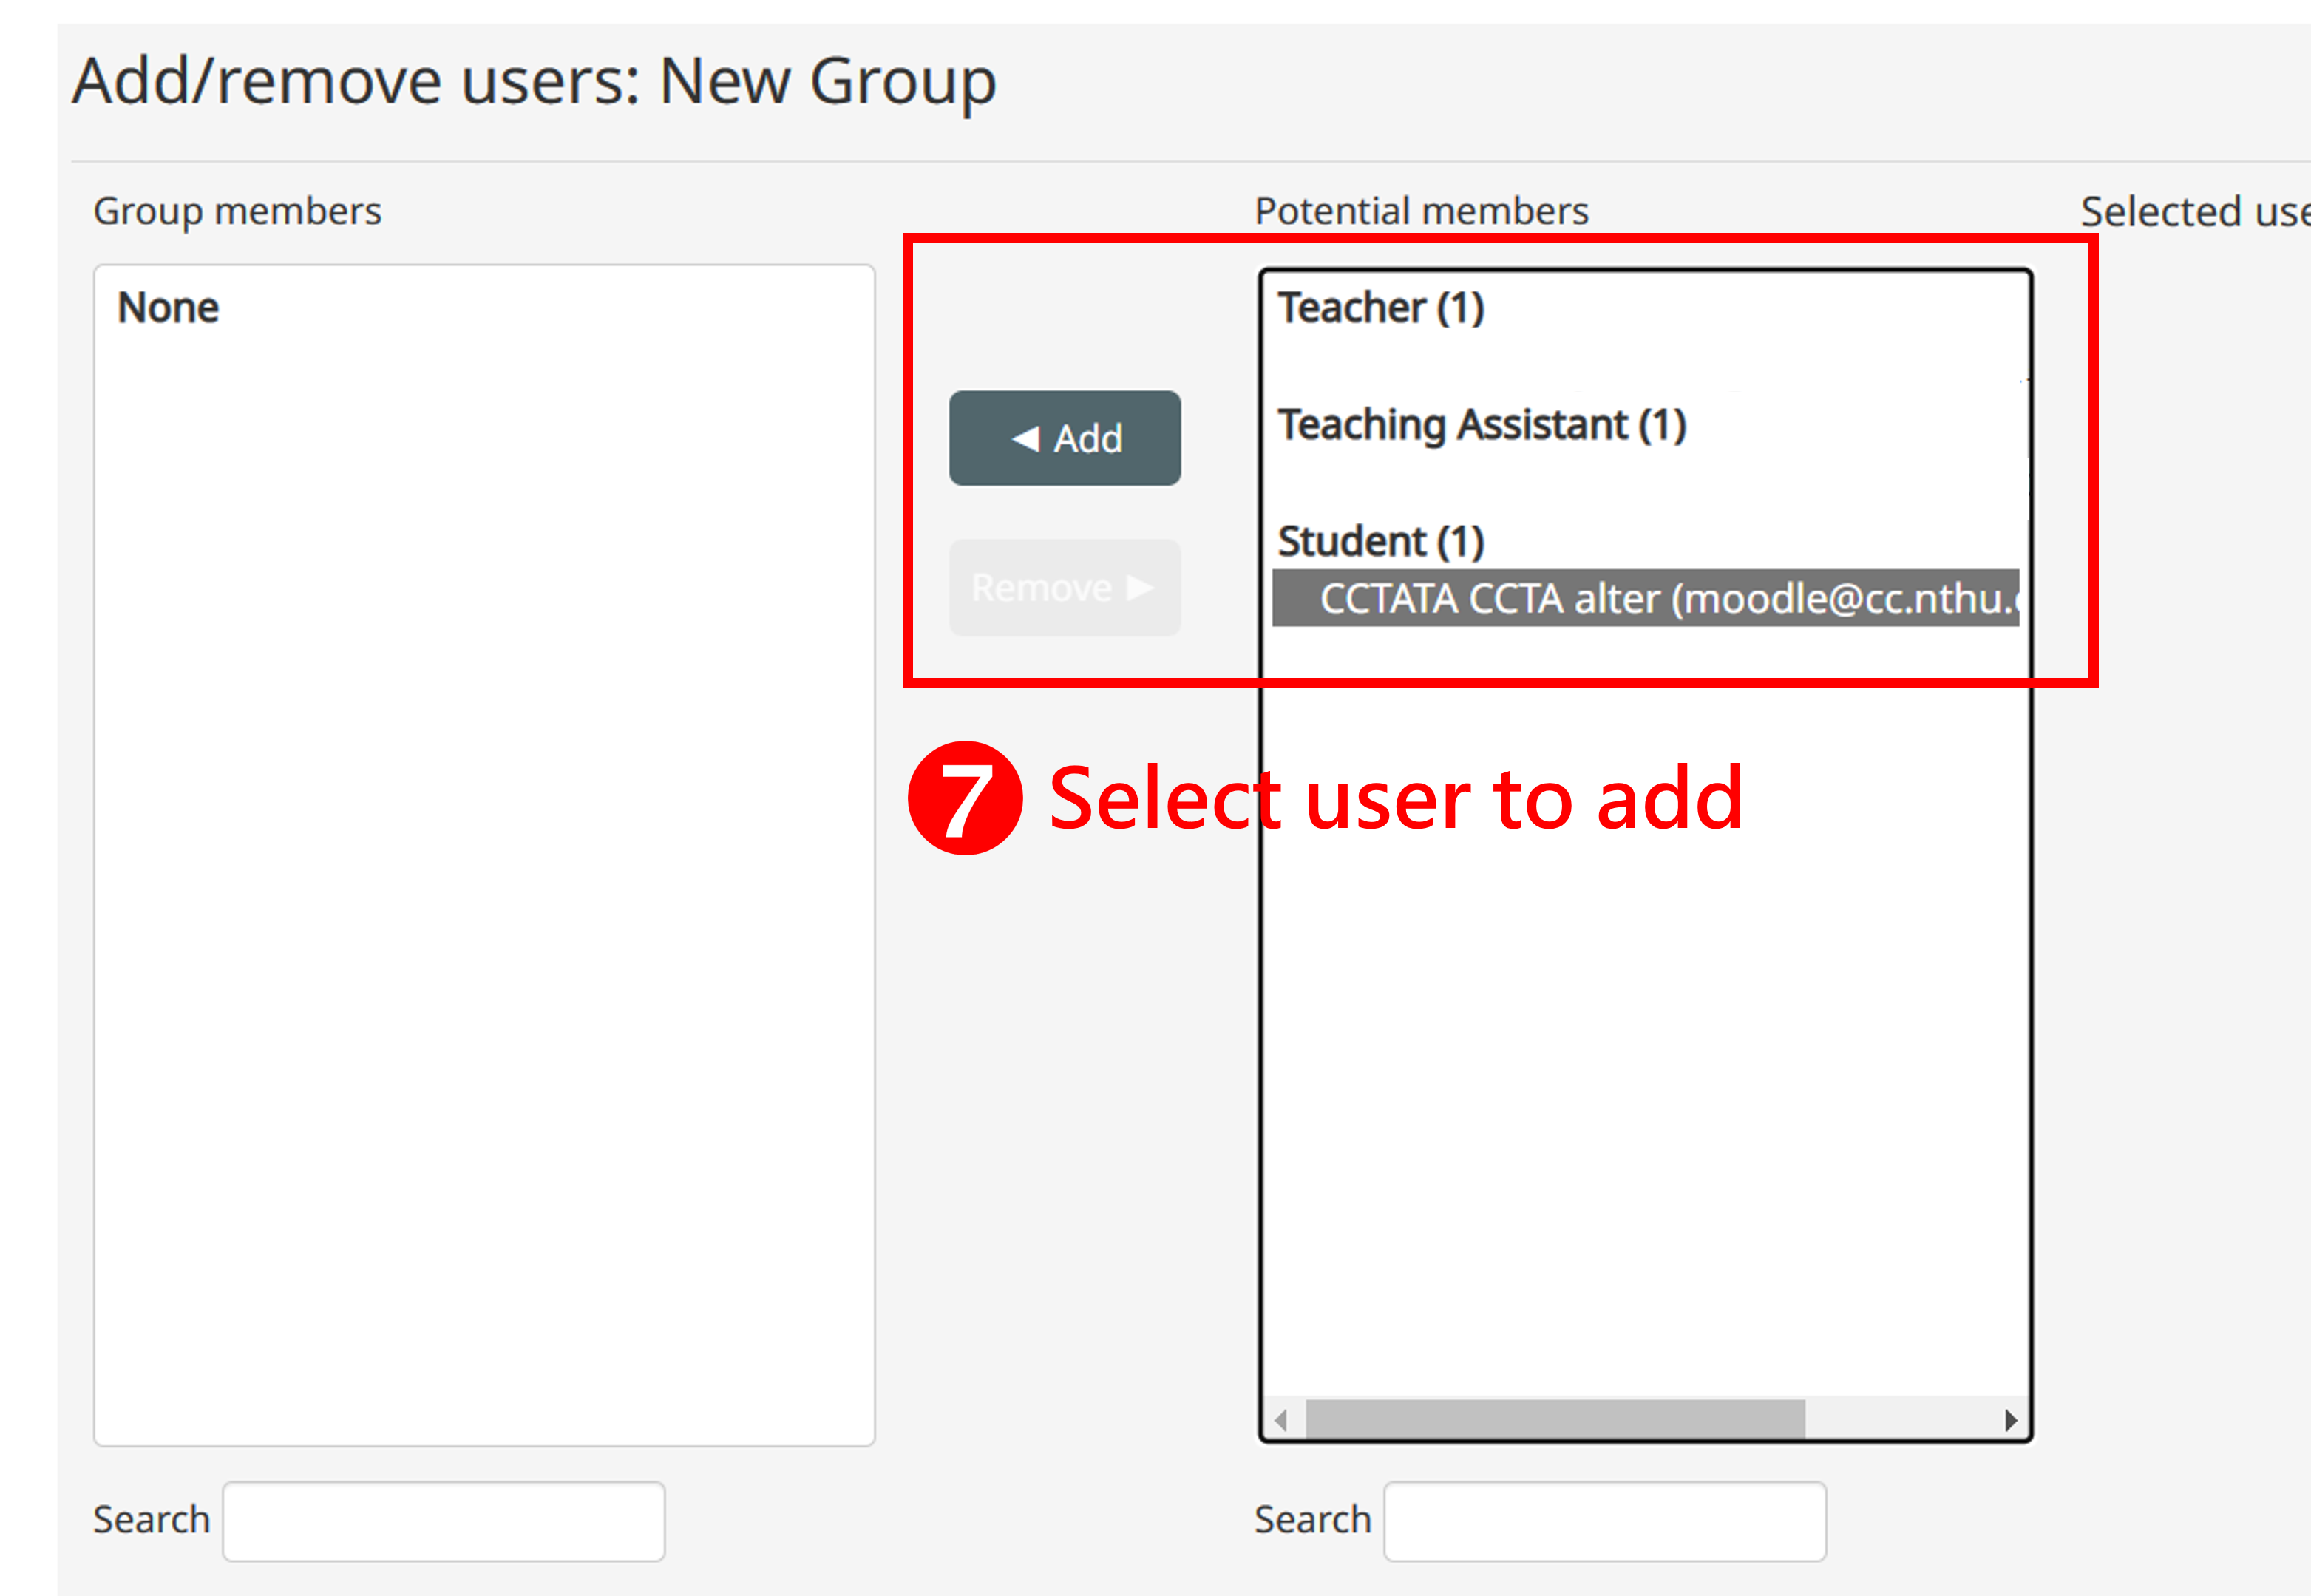
Step 7: After selecting the members to be assigned to this group, press "Add", and then return to the group, you're done.
*If you need to change the nature of the group, please refer to "Administration/Course administration/Edit setting", there is a field for a group setting, and the group mode can be changed.
No groups: No groups are distinguished.
Separate groups: Each group member can only see their own group, others are invisible.
Visible groups: Each group member works in their own group, but can also see other groups.

If you encounter any problems, please send an email ( elearn@my.nthu.edu.tw)), or call the campus extension 31243 or 35107, and report the problem directly to the system administrator.
To quickly understand your problem, welcome to use the screenshot and attach the file for us to help you solve the problem.